“Hey Google” with Rasa – complete CI/CD solution for multilingual chatbots
23 Aug 2020
In this article I will show how to build the complete CI/CD solution for building, training and deploying multilingual chatbots. I will use Rasa core framework, Gitlab pipelines, Minio and Redis to build simple two language google assistant.
The project code is available on my github https://github.com/qooba/heygoogle-with-rasa
Before you will continue reading please watch quick introduction:
Architecture

The solution contains several components thus I will describe each of them.
Google actions
To build google assistant we need to create and configure the google action project.
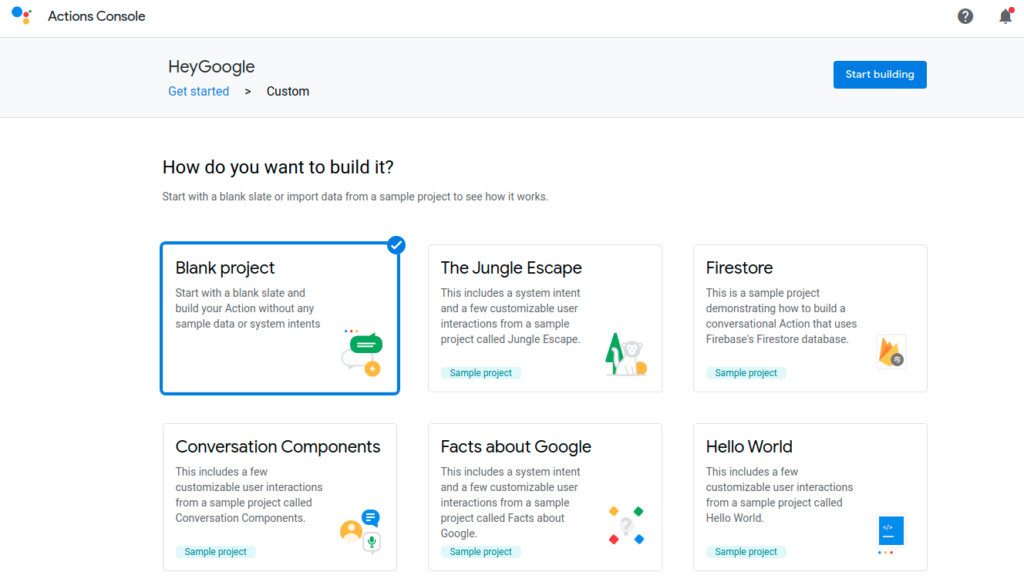
We will build our own nlu engine thus we will start with the blank project. Then we need to install gactions CLI to manage project from command line. To access your projects you need to authenticate using command:
gactions login
if you want you can create the project using templates:
gactions init
to simplify the tutorial I have included configuration in the repository. You will need to set your project id in settings.yaml and webhook configuration using your ngrok address. Configuration can be deployed using command:
gactions push
Ngrok
As mentioned before for development purposes I have used the ngrok to proxy the traffic from public endpoint (used for webhook destination) to localhost:8081:
ngrok http 8081
NGINX with LuaJIT
Currently in google action project is not possible to set different webhook addresses for different languages thus I have used NGINX and LuaJIT to route the traffic to proper language container. The information about language context is included in the request body which can be handled using Lua script:
server {
        listen 80;
        resolver 127.0.0.11 ipv6=off;
        location / {
            set $target '';
            access_by_lua '
                local cjson = require("cjson")
                ngx.req.read_body()
                local text = ngx.var.request_body
                local value = cjson.new().decode(text)
                local lang = string.sub(value["user"]["locale"],1,2)
                ngx.var.target = "http://heygoogle-" .. lang
            ';
            proxy_pass $target;
        }
    }
Rasa application
The rasa core is one of the famous framework for building chatbots. I have decided to create separate docker container for each language which gives flexibility in terms of scalability and deployment. Dockerfile (development version with watchdog) for rasa application (qooba/rasa:1.10.10_app):
FROM rasa/rasa:1.10.10
USER root
RUN pip3 install python-jose watchdog[watchmedo]
ENTRYPOINT watchmedo auto-restart -d . -p '*.py' --recursive -- python3 app.py
Using default rasa engine you have to restart the container when you want to deploy new retrained model thus I have decided to wrap it with simple python application which additionally listen the redis PubSub topic and waits for event which automatically reloads the model without restarting the whole application. Additionally there are separate topics for different languages thus we can simply deploy and reload model for specific language.
Redis
In this solution the redis has two responsibilities:
- EventBus - as mentioned above chatbot app listen events sent from GitLab pipeline worker.
- Session Store - which keeps the conversations state thus we can simply scale the chatbots
We can simply run Redis using command:
docker run --name redis -d --rm --network gitlab redis
Minio
Minio is used as a Rasa Model Store (Rasa supports the S3 protocol). The GitLab pipeline worker after model training uploads the model package to Minio. Each language has separate bucket:
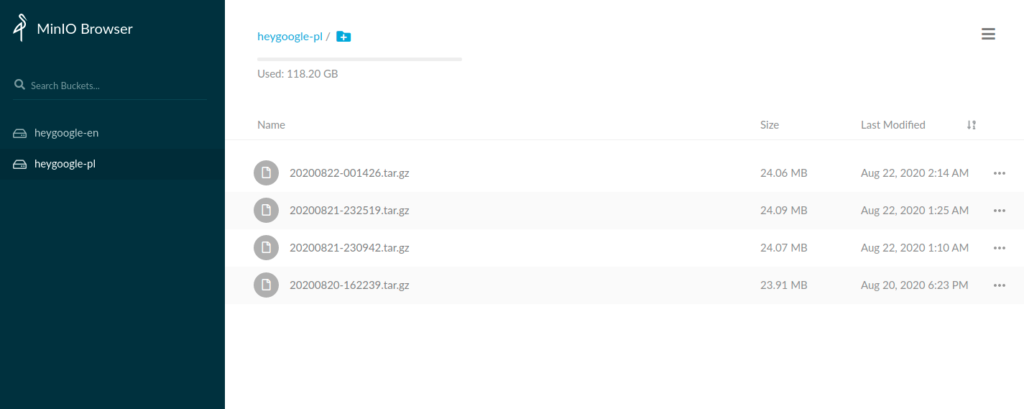
To run minio we will use command (for whole solution setup use run.sh where environment variables are set) :
docker run -d --rm -p 9000:9000 --network gitlab --name minio \
  -e "MINIO_ACCESS_KEY=$MINIO_ACCESS_KEY" \
  -e "MINIO_SECRET_KEY=$MINIO_SECRET_KEY" \
  -v $(pwd)/minio/data:/data \
  minio/minio server /data
Gitlab pipelines
In this solution I have used the gitlab as a git repository and CI/CD engine. You can simply run the GitLab locally using gitlab docker image:
docker run -d --rm -p 80:80 -p 8022:22 -p 443:443 --name gitlab --network gitlab \
  --hostname gitlab \
  -v $(pwd)/gitlab/config:/etc/gitlab:Z \
  -v $(pwd)/gitlab/logs:/var/log/gitlab:Z \
  -v $(pwd)/gitlab/data:/var/opt/gitlab:Z \
  gitlab/gitlab-ce:latest
Notice that I have used gitlab hostname (without this pipelines does not work correctly on localhost) thus you will need to add appropriate entry to /etc/hosts:
127.0.1.1 gitlab
Now you can create new project (in my case I called it heygoogle). Likely you already use 22 port thus for ssh I used 8022. You can clone the project using command (remember to setup ssh keys):
git clone ssh://git@localhost:8022/root/heygoogle.git
Before you can use the gitlab runner you have to configure at least one worker. First you get registration token (Settings -> CI/CD -> Runners):
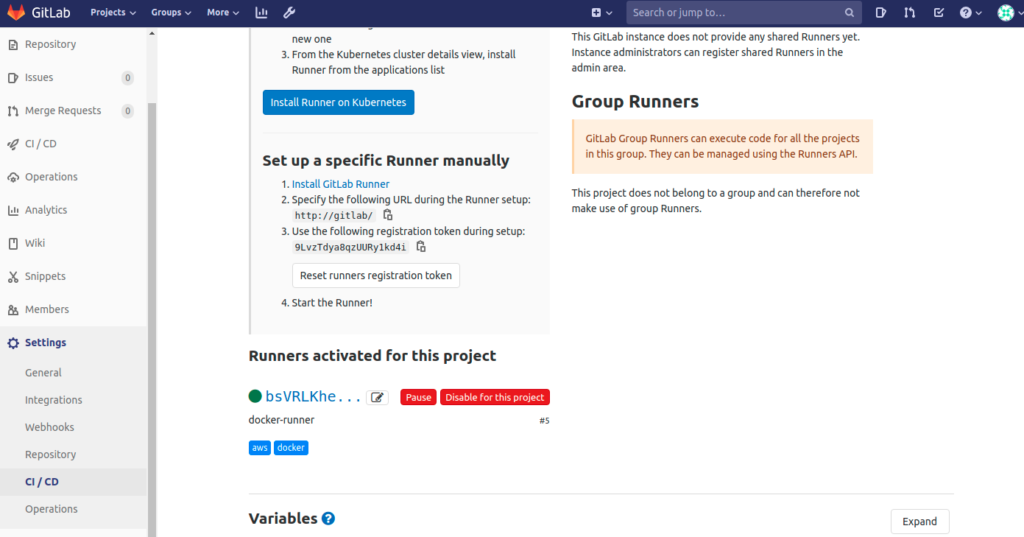
and run once:
docker run --rm --network gitlab -v /srv/gitlab-runner/config:/etc/gitlab-runner gitlab/gitlab-runner register \
  --non-interactive \
  --docker-network-mode gitlab \
  --executor "docker" \
  --docker-image ubuntu:latest \
  --url "http://gitlab/" \
  --registration-token "TWJABbyzkVWVAbJc9bSx" \
  --description "docker-runner" \
  --tag-list "docker,aws" \
  --run-untagged="true" \
  --locked="false" \
  --access-level="not_protecte
Now you can run the gitlab-runner container:
docker run -d --rm --name gitlab-runner --network gitlab \
     -v /srv/gitlab-runner/config:/etc/gitlab-runner \
     -v /var/run/docker.sock:/var/run/docker.sock \
     gitlab/gitlab-runner:latest
To create pipeline you simply commit the .gitlab-ci.yml into your repository. In our case it contains two steps (one for each language):
variables:
  MINIO_ACCESS_KEY: AKIAIOSFODNN7EXAMPLE
  MINIO_SECRET_KEY: wJalrXUtnFEMI/K7MDENG/bPxRfiCYEXAMPLEKEY
  PROJECT_NAME: heygoogle

stages:
  - process_en
  - process_pl

step-1:
  image: qooba/rasa:1.10.10
  stage: process_en
  script:
    - ./pipeline.sh en
  interruptible: true

step-2:
  image: qooba/rasa:1.10.10
  stage: process_pl
  script:
    - ./pipeline.sh pl
  interruptible: true
Gitlab pipeline steps use qooba/rasa:1.10.10 docker image:
FROM rasa/rasa:1.10.10
USER root
RUN apt update && apt install git -yq
ENTRYPOINT /bin/bash
thus they have complete rasa environment.
The pipeline.sh script:
#!/bin/bash

lang=$1
echo "Processing $lang"

if (($(git diff-tree --no-commit-id --name-only -r $CI_COMMIT_SHA | grep ^$lang/ | wc -l) > 0)); then
   echo "Training $lang"
   cd $lang
   rasa train
   rasa test
   cd ..
   python3 pipeline.py --language $lang
else
   echo
checks if something have changed in chosen language directory, trains and tests the model and finally uploads trained model to Minio and publish event to Redis using pipeline.py:
import os
import boto3
import redis
from botocore.client import Config

def upload_model(project_name: str, language: str, model: str):
    s3=boto3.resource("s3",endpoint_url="http://minio:9000",
        aws_access_key_id=os.environ["MINIO_ACCESS_KEY"],
        aws_secret_access_key=os.environ["MINIO_SECRET_KEY"],
        config=Config(signature_version="s3v4"),region_name="us-east-1")
    bucket_name=f'{project_name}-{language}'
    print(f"BUCKET NAME: {bucket_name}")
    bucket_exists=s3.Bucket(bucket_name) in s3.buckets.all() or s3.create_bucket(Bucket=bucket_name)
    s3.Bucket(bucket_name).upload_file(f"/builds/root/{project_name}/{language}/models/{model}",model)


def publish_event(project_name: str, language: str, model: str):
    topic_name=f'{project_name}-{language}'
    print(f"TOPIC NAME: {topic_name}")
    client=redis.Redis(host="redis", port=6379, db=0);
    client.publish(topic_name, model)

if __name__ == '__main__':
    import argparse

    project_name=os.environ["PROJECT_NAME"]

    parser = argparse.ArgumentParser(description='Create a ArcHydro schema')
    parser.add_argument('--language', metavar='path', required=True,
                        help='the model language')

    args = parser.parse_args()
    model=os.listdir(f"/builds/root/{project_name}/{args.language}/models/")[0]
    print("Uploading model")
    upload_model(project_name=project_name, language=args.language, model=model)

    print("Publishing event")
    publish_event(project_name=project_name, language=args.language, model=model)
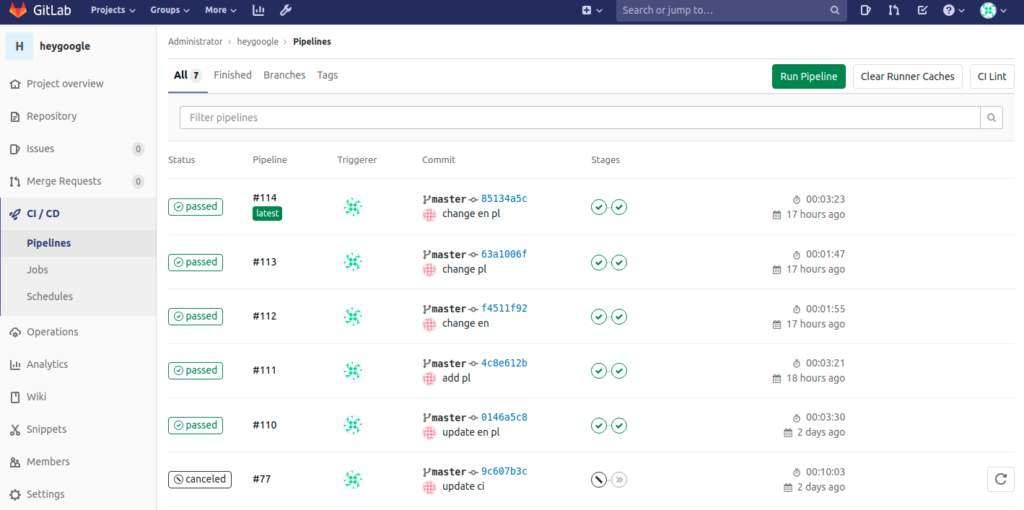
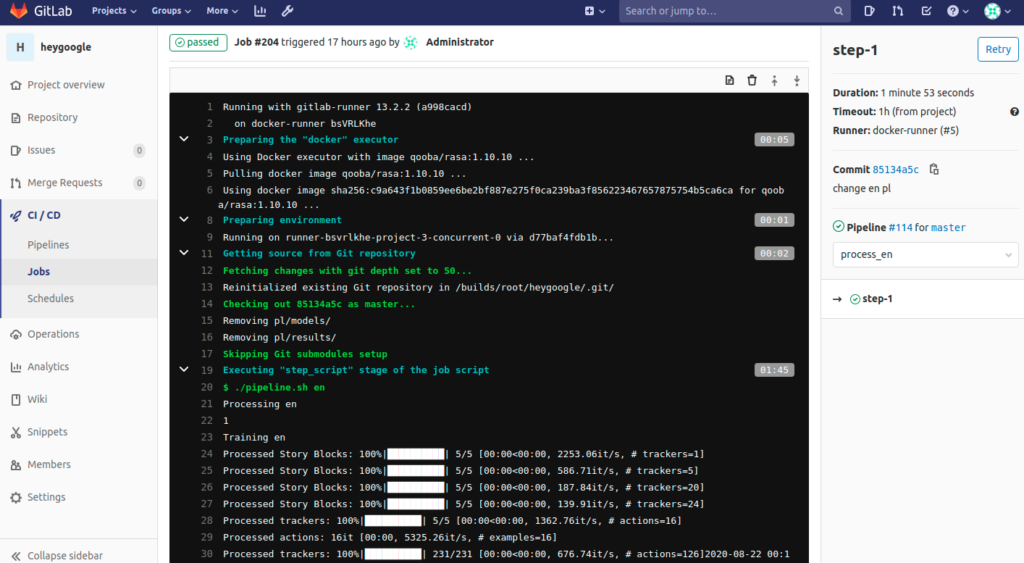
Now after each change in the repository the gitlab starts the pipeline run:
Summary
We have built complete solution for creating, training, testing and deploying the chatbots. Additionally the solution supports multi language chatbots keeping scalability and deployment flexibility. Moreover trained models can be continuously deployed without chatbot downtime (for Kubernetes environments the Canary Deployment could be another solution). Finally we have integrated solution with the google actions and created simple chatbot.